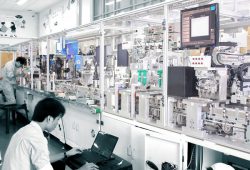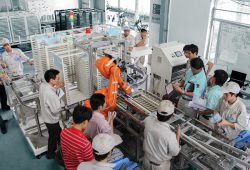
Diameter and coaxiality inspection machine
Application of measuring diameter and coaxiality:
Diameter measuring machine and shaft reversal are specialized measuring machines. The machine is used a lot in customer factories to manufacture and fabricate series axis parts. Requires QC before leaving the factory to check the accuracy for important parameters. Includes checking their diameter and reversal. It is used to measure completely automatically and produce the results on the display screen for the printer shaft, photocopier, and axes in the machining machines. Automated testing solutions provided by CNC-Vina always give customers the benefits of ensuring product output quality and controlling unnecessary mistakes. Automatic measuring products are designed 3D, simulated for customers before conducting fabrication and assembly at the CNCVina factory.
Technical parameters of diameter and coaxiality
Machine size: 650 (W) x 1000 (D) x 1600 (H)
Operation height of the machine: 950 ± 50 mm from the floor.
Voltage source 1 phase, AC 220V, 50 Hz Capacity: 1.5 KW
Control power: DC 24V
Air source requirement: 0.4 - 0.6 MPa
Structure and principles of operation
Measuring machine includes main clusters:
- Body, chassis and moving and slide structures
- Jigs, jigs, bearings according to the product
- Cluster of measuring head (Yamaha robot, KEYENCE measuring head ...)
- Control and display equipment cluster (PC, keyboard, HMI touch screen, LCD display ...)
Automatic measuring of diameter and shaft reversing is operated and measured completely automatically. Based on the motion of the parts (created by the combination robot assembly) is recorded with a modern, high-precision measuring head assembly. The system automatically operates, rotates and measures, calculates and displays results for operators.
Outstanding features of CNC-Vina automatic measuring machine
Automatic measuring of diameter and coaxiality of shaft-type parts is designed for fully automatic measurement operation. The parts to be measured are placed on the cluster of transfer combinations. The system automatically operates, rotates and measures points and displays the results for the operator.
Use HMI touch screen to control
Use the LCD monitor to display the results and measurement parameters
Instruction for operation, DANDORY and maintenance
Operating measuring machine, shaft reversal for shaft parts
Simple operation with JIGS, machining and pre-set measuring mode according to product models by CNCVina.
Before starting the machine, adjust the distance between the two measuring clusters.
Provide the work position of the product.
Press the "START" button, the machine starts measuring the product.
The measurement results will be displayed on the LCD screen.
DANDORY Steps (replace jig, Jig)
Step 1: Loosen the fastening pin on the cluster so that the jig can be carried out. (Replace only jigs for right clusters)
Step 2: Insert the jigs to be replaced corresponding to the model of the product to be measured at the location. Fasten the fastening screw to fix the jig fast.
Step 3: Set the axis model to be tested at the position to be tested to test it before the machine works continuously.

Dandory guide measuring machine according to the process built by CNCVina for customers
Instructions for maintenance and maintenance of measuring machines.
Check monthly with the following items to ensure timely detection and handling of problems arising during operation. Help the machine operate stably and accurately.
- Shaft: check whether the shaft is dirty, stuck, or scratched
- Check and check lubricant grease for silver ball bearings, slides
- Check and tighten pully and belt
- Check robots (refer to machine documentation)
OUR PARTNERS


 English
 Vietnamese
 Japanese


